Category Archives: Uncategorized

Side Bracing

Side bracing on an acoustic guitar is simple and structural in nature. I discuss a simple process for creating, fitting and spacing braces on the bent sides of your guitar.

 
Was this useful? I would love to hear your questions or comments! I try to answer every e-mail I receive, so please be patient with me :) eric@ericschaeferguitars.com

Want more of this? Subscribe below for Weekly Guitar Making Tips on “The Small Shop Luthier Blog”


Want to really learn more!? Take a class with Eric Schaefer and build your own guitar in 8 days!

ES BACKGROUND
Or Join The Online Guitar Building School
ES Guitars ONLINE


Creating a Headstock Template

In this excerpt from the Online Course, I demonstrate a practical method for creating a headstock template, whether copying your peghead design from plans or designing your own.
Creating a simple Martin style paddle shape certainly simplifies things. However, I demonstrate a more interesting design incorporating long symmetrical curves.

Was this useful? I would love to hear your questions or comments! I try to answer every e-mail I receive, so please be patient with me :) eric@ericschaeferguitars.com

Want more of this? Subscribe below for Weekly Guitar Making Tips on “The Small Shop Luthier Blog”


Want to really learn more!? Take a class with Eric Schaefer and build your own guitar in 8 days!

ES BACKGROUND
Or Join The Online Guitar Building School
ES Guitars ONLINE


Cutting the Scarf Joint

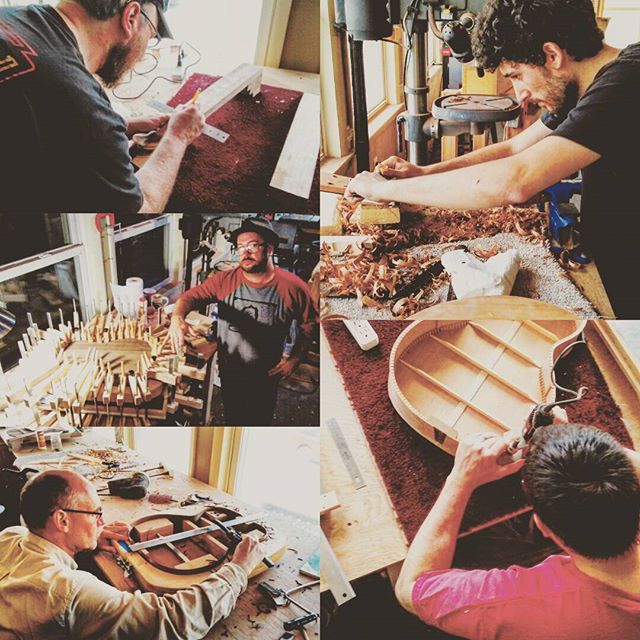
In this excerpt from the Online Guitar Building School, I cut and prepare the scarf joint for the headstock.

Video Transcript:

Okay, we are ready to begin work on the neck! From
this single blank of wood I will cut and make the scarf
joint for the headstock and I will also cut and
assemble the blocks for the heel.
I start with a blank of wood, in this case Mahogany,
that is 1″ by 3″.
If this will be your first time hand-carving a neck, I
highly recommend Mahogany for its strength and ease of
use in shaping and carving operations. Other neck woods
may be difficult to work, so you may want to
save that highly figured

The blank should be atleast 32″ in length, although
it can be shorter if you have another blank from which to
cut the blocks for the heel.

Let’s begin by marking the blank for several cuts that
we want to make.

First I square a line 7 1/2″ from one end of the blank.
This marks where the headstock ends and where the nut
begins. This is also where I cut the angle for the scarf
joint, which in this case will be a 15 degree angle.
I pull the squared line onto the sides of the blank.

I pull the squared line onto the sides of the blank,
and use a protractor to mark the 15 degree angle
on both sides.

Then I connect where the two angled lines meet on the
bottom face of the blank. This gives a full representation
of where the angled cut will be on all sides of the blank.

After I make the angled cut for the scarf joint, I will be
thicknessing the offcut to 1/2″, so I will go ahead and
mark that now.

After I make the angled cut for the scarf joint, I will be
thicknessing the offcut to 1/2″, so I will go ahead and
mark that now.

Notice that it is the longer part of the offcut that I will
be thicknessing to 1/2″ and keeping as the headstock.
The shorter portion is waste.

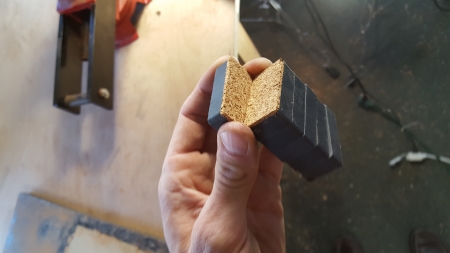
To give you a rough idea of the order of operations here,
first we cut along the angled line for the scarf joint, then
we cut the headstock to thickness
and the remaining piece gets glued
to the bottom of the neck
blank creating what is called a scarf joint for the
headstock.
This is sort of an oversimplification so let’s get into
the details of how to perfect this joint.

Here I am resting the neckblank on the bandsaw table
and checking for square. However, if your bandsaw table
is not square to the bandsaw blade, I would start there
first.
The blank is slightly out of square with the table.
Notice the gap at the bottom of the square.

A few passes on the shooting board with a jack plane
trues up the side.

That’s better. There is a tiny hairline gap at the top
of the square now, but that’s okay. As you’ll see later,
any out of squareness in the cut can be corrected when
we fine-tune the joint.

I prefer to use a 3/8″ blade for this cut. On a 1/4″ blade
the teeth are too fine and the gullets between the teeth
too small to deal with such a heavy cut. Not to mention,
the narrow blade doesn’t track well.
On the other hand, the 1/2″ blade cuts effectively,
and tracks well but it leaves a very coarse surface.
3/8″ seems to be the happy medium.

I set the blade tension for a 3/8″ blade.

I make sure the blade tracks well on the wheel.

And then I set the guide bushings.

I like to set all the bushings so that I can fit a .025″
feeler gauge between the bushing and the blade.

It is always a good idea to have a well set bandsaw.
The table setup, the blade tension, the tracking,
and the guide bushings all factor into the outcome of
the cut.

The last thing I do is set the guide to just barely clear
the workpiece.

The cut is done carefully by hand, working very slowly,
only applying enough pressure to allow the piece to
move forward as the blade clears the wood. Be patient
and do not force it.
Try to keep the blade right on the line. If it drifts, gently
correct it’s course back towards the line.
It is easy to stay on the line if you keep your
focus a short distance ahead of the blade, rather than
right where the blade is cutting.

And now the thickness cut!
I set the table saw fence for a 1/2″ cut. Of course, you
can also make this cut on the bandsaw.

Okay, now let’s fine-tune the joint. I clamp the neck
blank in a vise.

I apply double stick tape to the headstock and
stick the headstock to the neckblank so that the
two angled planes line up.

I clamp two pieces of scrapwood to the sides of the
blank to act as a fence. This makes it easy to stick the
headstock down in proper alignment with the neckblank.

My protractor verifies for me that the angled plane is at
or close to 15 degrees.

The skew of the angled plane can be checked with
a square. Notice the two lines that I am checking:
The line at the top of the angled plane
and the line in the middle where the headstock and
the neckblank meet. If these lines are not
perpendicular to the sides, then the plane is skewed.
I use a block plane, not only to clean up the bandsaw
marks, but also to manage the skew of the angled plane.

As always, it’s not a bad idea to chalk up the surface
so you can see the progress of your work.

I stop to check the two lines with a square.

And then I continue working with the block plane
until all the chalk marks disappear.

Okay, the chalk marks are gone and the lines
are perpendicular to the sides, indicating that the
angled plane is not skewed.
Next, I use sandpaper and a flat
block to remove plane marks and to smooth the surface.

It is always important to make sure that the block
you use is indeed flat.
You’d be surprised how often this is the source of
problems.

This block, by the way, is 3″ by 4 1/4″. That seems to
be a good size for this task.

When sandpaper is pressed between 2 hard surfaces,
the hardwood of the workpiece and the hardwood of
the block, the grit wears down very quickly.
Backing the block with thin cork adds a bit of cushion
to the block which drastically extends the life of the
sandpaper.

Now I attach 120 grit sandpaper
Be sure to trim those loose ends of sandpaper
with a razor blade.
Loose ends have a tendency to leave a slight round to
the edges of your workpiece.

Okay, now that we have an effective sanding block, let’s
chalk up and sand until the marks disappear.
Notice how I sand with a circular motion rather than a
back and forth motion.
With the back and forth technique, the hand has a
tendency to tip slightly every time the hand switches
its momentum from one direction to the other.

The chalk marks are gone, with the exception of this
one stubborn, low spot in the corner. I’m not going to
worry about this spot. The glue joint is actually between
the headstock piece and the bottom of the neckblank.

Finally I finish prepping the surface by sanding to 220
grit.

The last thing I do to prepare the joint is sand the
bottom of the neckblank, where the headstock
will be attached, up to 220 grit.

I use the heatgun and spatula to remove the headstock.

A final check with a straightedge for large gaps, and
we are ready to attach the headstock.

In the next lesson we will attach the headstock and heelblocks.


The End Wedge

A decorative end wedge hides the seam between the sides at the lower bout. This video excerpt from the Online Guitar Building School goes into detail about design considerations and the process for creating a clean and attractive endwedge.

Video Transcript:

Okay, the sides are looking pretty good at this point.
The addition of a decorative endwedge will make the
seam at the lower bout disappear and it will carry the
design motif that you’ve established with the rosette
to other parts of the guitar.

I clamp a board so that it overhangs the workbench and
hang the sides on the board with the lower bout seam
facing up.

I mark the center at the top and bottom of the endblock
and carry both of those centerlines onto the side with a
square.

By squaring the centerline onto the sides from both the
the top and bottom of the endblock, you may notice that
you get two centerlines. This is a relatively common
occurance.

It simply means that at some point during
radius sanding you sanded a little heavy to one side or
the other and now the endblock is out of square, like
you see here. This is not an issue. Just know that you’re
true center is directly in the middle of those two lines.
It should also be mentioned that the seam between the
two sides is not a reliable measure of center.

Now let’s make the endwedge. I use the same material
that I used for the rosette. I find a section of the
material that I am using that has similar grain and color.
That’s where I will mark out my endwedge.

I use a straightedge to make two converging lines with
the grain or any interesting banding running relatively
straight down the center between those two lines.
The taper can be dramatic or slight. It is a matter of
taste. Just know that, in order to use this method,
you cannot have no taper at all. The wedge shape of the
aptly named endwedge has an important functionality
when it comes to fitting and gluing it in place.

I cut out the endwedge on the bandsaw, staying 1/16″
outside of the line.

The endwedge can now be planed down to the line on
the shooting board with a block plane. Keep in mind that
it is best to shoot the plane from the wide end of the
taper to the thin end, to avoid catching the grain and
tearing out.

I’ve decided which face I want to be the show face and
now I flip the endwedge over to find and mark the
centerline on the opposite face.

To make a lengthwise centerline on a tapered wedge,
first I make 2 parallel lines. I find the center of each line
and then connect the those center marks with a straight
edge.

I use double stick tape and 2 cam clamps to hold the
endwedge in place.

I carefully line up the centerline of the endwedge with
the centerline on the sides and clamp it in place.

I use the endwedge as a fence for making a saw cut
on each side. A fine toothed dovetail saw or, in this
case, a japanese dsouki saw, make the cuts. Take your
time setting the cut and be very careful not to
inadvertently skate off the line. The goal is to cut all
the way through the glue line of the sides until
I reach the endblock. If I cut a little bit in to the
endblock that’s okay.

Now I move the clamps to the other side so I can
make the second cut. This is why I used the double
stick tape. So the endwedge doesn’t lose its place while
I move the clamps.

Once the two outside cuts are made,
I heat up a spatula and remove the double stick tape

Now I make several cuts to the inside so that
the material can pop out with a chisel.

These cuts are quick, rough cuts so I use a piece of scrap
as a fence rather than risking damage to my endwedge.

I adjust the fence for another cut. Every cut should be
about 1/8″ apart.

I make sure that all the cuts extend past the glue line
and into the endblock atleast a little bit. The material
comes out cleaner if the cuts are through the glue line.

I use a cam clamp as a backstop. The backstop not only
keeps the sides from moving around, it also creates
support for the first row of woodchips that I will remove
with the chisel. Without the backstop, the first row
would likely tear out onto the top surface of the
endblock. I simply press the chisel along the grain lines,
being very careful not to mar the outside saw cuts.

At this point the recess that you’ve created should be
fairly rough. I clean it up a little bit with a chisel,
however, you can easily damage the clean edge of the
outside saw cuts, so be careful.
Since the endwedge is aesthetic and not structural
in any way, I am not concerned with getting a perfectly
flat and smooth bottom.

I slightly round the edges on the glue face of the
endwedge so it doesn’t get hung up in the corners.

Now let’s check the fit…

It’s a great fit… but the two woods are so similar
in color that I believe something needs to be done
to create some contrast.
Thin wood strips can be ordered in various colors from
luthier suppliers. I can slide a wood strip in place and
see if I like the contrast of color.

That looks pretty good… but let’s see what it looks
like with a white strip.

The white strip looks great and it will fit well with the
binding that I’ve chosen to use later.

I break apart the white strip so that it overhangs the
endwedge recess slightly.
…I do the same thing on the other side.

Now we are ready for glue.
I mark with a pencil where the endwedge overhangs,
simply so I know not to spread glue in those areas.

I make sure I spread a little glue on the edges as well,
especially if I am adding wood strips to the design.

2 spring clamps apply downward pressure.

Now I make a pencil mark on the endwedge where it
meets the edge of the side.

I tap the endwedge a few times with a hammer, lightly,
to wedge it in place.
The pencil mark should move just slightly, indicating that
the endwedge has moved just slightly and now is properly
wedged.

I let this dry for atleast 45 minutes.

Now to remove the excess…
First I trim the wood strip with a razor knife.

A flush cutting saw works best for removing the overhang
because the saw’s teeth are angled up slightly, so you
don’t mar the surface of the endblock. Other saws or
methods can be used as long as you are careful not to
mar the endblock.

It’s not a bad idea to place a clamp over the endwedge
while you cut, so you don’t accidentally force the
endwedge loose.

When you selected the wood for the endwedge, hopefully
you selected a piece that is thicker than the side
thickness and now the endwedge is sitting proud of the
surface.

I level the endwedge with a block plane until it is close
to flush.

Then I switch to sandpaper on a flat block to bring it
completely flush.

Let’s sand it to 220 grit just to see what it will look like
all smoothed out.

It is important that the endwedge is either perfectly flush
or a little shy of the glue surfaces for the plates.
I carefully use a chisel to trim down any material that the
flush cutting saw didn’t get. To be on the safe side, I will
trim the endwedge a little bit shy of the surface. Any gap
that results from this will be removed later
when I add binding.
Notice how I handle the chisel in a way that keeps the
chisel’s edge away the endblock so I don’t mar that
surface.

Okay, the endwedge is ready for it’s debut. I take the
sides out into the natural daylight and rub mineral spirits
on the area. Mineral spirits roughly mimicks the
effects of finish so you can get a glimpse of what
the end product will look like.

When a Neck Removal Goes Bad!


To follow up episode #22 When a Bridge Removal Goes Bad, I decided to also write an article on bad neck removals as well.

This neck removal was particularly hairy. I won’t get into why this was the case, but you can see the damage to the soundboard beneath the fretboard tongue was extensive!

Not to worry, though. Even this can be remedied!

This picture was taken after I had already removed the worst of the damaged wood from the front of the neckblock with a sharp chisel. You can also see that I had to remove a part of the fretboard graft, which is a flat graft that runs crossgrain beneath the fretboard tongue. This is the V-shaped cut.


P1040239

In order to be able to re-glue the fretboard tongue to this area I need to patch in a pad of fresh spruce over the entire affected area. Also, since the fretboard graft was significantly damaged I need to consider the structural integrity of the area as well.

My first objective is to clear everything down to the glue surface of the neckblock, the fretboard graft, and the transverse bar. I am not going to use a dremel tool here as I did in #22 When a Bridge Removal Goes Bad. This is because it is difficult to support the dremel tool as I did in that situation. The location of the soundhole is a problem.

Instead I will carefully clear the material with a variety of sharp chisels and abrasive tools.

But first, as a protective measure, I need to make a cross-grain cut at the edge of the affected area, just before the soundhole edge. That way, as I remove material, the spruce cannot tear out along the grain lines and affect the area outside of where I am working.

I do this by drilling several holes with a tiny bit, and using either a large jeweler’s saw blade or a small coping saw blade removed from the saw’s frame to cut along those holes. You will notice that the cut is made just outside the transverse bar.

P1040240

P1040241

P1040242

To clear the material I used a variety of sharp chisels, being very careful near the edges or, in some cases avoiding the edges altogether.

I used the sanding stick on the right of the picture for stubborn areas and to get into corners. The file on the left was used to square up and straighten the edges. And finally, small sanding blocks stuck with 80 grit, 120 grit and 220 grit paper were used to clean up residual glue and truly flatten the area in preparation for the patch.  I like my glue surfaces to be impeccably clean, flat and smoothed to 220 grit.


P1040243

Now I can take on the structural concerns.

It would be difficult to just patch in a repair to the fretboard graft as it is. Also, in cases of extreme damage such as this, I would rather err on the side of over-bracing the area.

That is why I decided to first alter the neckblock to increase it’s contact area.

It is a mahogany bock, so in staying true to instrument’s construction, I found a mahogany scrap and I squared and shaped it to fit snugly in the truss rod access cavity. The scrap is glued in place a little bit proud of the surrounding surface so that it can be levelled later.


P1040245

P1040246

While it was clamped up, I drilled an oversized hole through the scrapblock, lengthwise, to open up access to the truss rod again. Doing this while it is clamped up prevents the scrap block from splitting apart.

P1040247

P1040248

Now I can more easily tackle the issue of the fretboard graft.

I put a significant bevel into the tattered ends of the fretboard graft (see the first picture). That way, I can put a corresponding bevel into the small spruce patches that I prepare (see the second picture). This creates a gluing surface for the repair and it allows me to easily clamp the patches so that they are nestled between the mahogany scrap and the fretboard graft (see the third picture).

P1040249

P1040250

P1040251

After the glue dried, I levelled and smoothed the mahogany and spruce fills.

You may notice that a part of the soundhole is missing! Well, I got a little too aggressive when I was levelling with the thumb plane and a piece chipped out. Fortunately, I recovered the piece and it can simply be glued back in place later.


P1040255

Finally, a spruce patch is fitted and cut to shape. Notice the hole in the middle of the patch. Because glue squeeze-out can be real problem if it gets near the finished surfaces, I drill a hole so that some of the excess glue can squeeze out into the hole rather than be forced out along the sides.

P1040256
Was this useful? I would love to hear your questions or comments! I try to answer every e-mail I receive, so please be patient with me :) eric@ericschaeferguitars.com

Want more of this? Subscribe below for Weekly Guitar Making Tips on “The Small Shop Luthier Blog”


Want to really learn more!? Take a class with Eric Schaefer and build your own guitar in 8 days!

ES BACKGROUND
Or Join The Online Guitar Building School
ES Guitars ONLINE


A Simple Jig for Cutting the Headplate Square to the Nut Slot

When I first started building guitars, I remember some of the difficulty that I had in cutting the headplate square to the nut slot.
I would clamp a piece of scrap wood to the headplate as a fence, but the fence would only keep me square to the sides. To get the edge of the headplate 90 degrees to the neck’s playing surface I would have to manage the angle of the saw blade by eye, and it would always be off by a little bit.

The problem is that the fence is being clamped to the headstock, which is pitched back at an angle.

I could change the angle of the saw bearing edge of the fence but that would assume that I would be building guitars with exactly the same headstock angle every time, and even though I do use the same 15 degree angle almost every time, there is a degree of deviation from 15 degrees that I accept, which would throw off the fence.

The ideal situation is to simply clamp the fence to the neck’s playing surface but the excess headplate material gets in the way.
The obvious solution was right under my nose and it took an outside perspective to see it.
Student, Pat Griffaton suggested that I simply remove some material from the bottom of the fence to allow for the excess headplate material…

It was an “Oh, Duh!” kind of moment, mixed with equal parts of jubilation and embarrassment.
I thought that this quick tip was worth sharing, so I made a short video to explain the fence:


Was this useful? I would love to hear your questions or comments! I try to answer every e-mail I receive, so please be patient with me :) eric@ericschaeferguitars.com

Want more of this? Subscribe below for Weekly Guitar Making Tips on “The Small Shop Luthier Blog”


Want to really learn more!? Take a class with Eric Schaefer and build your own guitar in 8 days!

ES BACKGROUND
Or Join The Online Guitar Building School
ES Guitars ONLINE

Using Magnets to Repair Side Splits

Martin 000-15This Martin 000-15 came into my shop with a long split in the sides on the treble side. The owner told me that the guitar was never dropped or bumped into anything. It never experienced any kind of trauma to cause the split.

Side Split

Furthermore, the guitar had been repaired previously for splits in the sides, also on the treble side. Again, the owner claims no previous trauma for the old splits as well. The picture below shows the previous repair with 3 cleats and one brace. The idea is that the cleats sow the split shut like a suture for a wound and the brace, in this case, prevents the split from spreading further along the grain if the split is re-opened.

Old guitar side split repair

Diagnosis: The guitar was built with excess tension in the side, or ribs, specifically the treble rib.

(The bass rib is isolated from the treble rib because the endblock and the neck block act as an enormous brace and buffer for the tension. Splits in the treble rib cannot spread to the bass rib)

The rest of the instrument shows no signs of humidity problems, poor care or neglect, so I would say that somewhere in the factory assembly process the treble rib was forced to conform to shape while the glue dried, thus “building” tension into the rib.

Cleating up the new split wouldn’t fix the problem of excess tension. The owner wanted to correct the problem FOR GOOD, so here was my solution:

Some guitars are built with braces on the sides. Often 4 or 5 braces but I’ve also seen guitars with many more braces than that. There is no widely regarded rule for that as far as I understand.

Side braces make splits less likely to occur in the first place, and more importantly, they isolate the split, preventing it from spreading. They also provide structural support for the instrument as a whole, but the primary reason I build my guitars with side braces is to prevent splits from spreading catastrophically.

Many guitars are also built without any side braces at all. And most of the time this doesn’t cause any problems. However, in this case, there is a problem on the treble rib only. So my solution is to brace the treble rib with 4 mahogany braces and then cleat the existing split. Again, the bass rib is not affected by the excess tension, so I won’t fix something that isn’t broken!

First I determined the size and location for my cleats.

Side split cleats

Of course, these cleats will be glued to the inside of the guitar, but I’ve laid them out on the outside for the camera.

I want to accomplish a few things here. For starters, I want cleats at both ends of the split. Then I want a cleat to suture it up with in the middle. You may notice that the middle cleat is positioned a little high and that it is larger than the other two. That is because there is a second, smaller split just above the first. The middle cleat is sized and positioned to bridge across both splits and to completely cover the smaller split.

This is enough to repair the splits. At this point, I put the cleats aside for later glue-up.

Now I turn my focus to creating braces so that no future splits occur. I want 4 braces with approximately even spacing (measurements are not necessary; just spaced by eye) and I want the braces to span from the back kerfing to the soundboard kerfing.

Because the top and back plates are domed, the length of the brace will be different for each location. Rather than get a precise measurement of length, which would be difficult, I simply cut my brace material into a sequence of lengths and test fit each length until I find one that is close. To get the fit snug, I can either sand it back until it just fits, or I can adjust the location slightly for a tighter fit, since the exact location of these braces is not critical anyway.


Side braces cut to size

Once the brace fits, I dress the brace up on the sanding board.


Beveling brace ends

Side brace shaping


I use stacks of magnets for gluing the braces. I’ve adhered cork to the face of some of the magnets. That way I don’t mar wood or finish.

Padded Magnets

I use the padded magnets first to position the brace and then I begin stacking the other magnets. The power of magnets increases as you stack them.


Gluing side braces

Gluing braces with magnets 2

Stacking magnets


magnets


Next the cleats are glued in the same fashion, using smaller magnets.

Gluing cleats to sides

Magnets cleats

Side split cleats and bracesAnd that’s it! A quick and dirty repair that will last. I also want to mention that these magnets were all purchased at one of the big box hardware stores, so they are not anything special. Any magnets will do, as long as you can stack enough of them to provide a sufficient clamping force.

I hope you liked this tip!
Was this useful? I would love to hear your questions or comments! I try to answer every e-mail I receive, so please be patient with me :) eric@ericschaeferguitars.com

Want more of this? Subscribe below for Weekly Guitar Making Tips on “The Small Shop Luthier Blog”


Want to learn more? Take a class with Eric Schaefer and build your own guitar in 8 days

ES BACKGROUND

Making Guitar Mold Spreaders

For this episode I am using an excerpt of The Online Guitar Building School’s Building an OM Acoustic series.

This video walks you through the construction of upper, waist, and lower bout spreaders to fit your guitar mold.

Was this useful? I would love to hear your questions or comments! I try to answer every e-mail I receive, so please be patient with me :) eric@ericschaeferguitars.com

Want more of this? Subscribe below for Weekly Guitar Making Tips on “The Small Shop Luthier Blog”


Want to learn more? Take a class with Eric Schaefer and build your own guitar in 8 days

ES BACKGROUND

When A Bridge Removal Goes Bad!

#22 when a bridge removal goes bad

My Canadian friend brought me a Norman guitar with a lifting bridge, a belly bulge, and long run-out splits in the soundboard beginning just forward of the belly bulge. These are all symptoms of the same problem: too much tension at the bridge.

Lifting bridge and belly bulge
A lifting bridge


First, the bulge in the belly needed to be reduced, then the bridge removed and reglued. Finally cleats were installed on the inside of the guitar to patch up the splits in the spruce. I also glued a thin graft to the underside of the area that was worn thin by years of heavy picking.

Attaching cleats to the soundboard
The cleats are placed on the outside of the guitar to demonstrate to the camera where they will be located. Of course, they will be glued to the INSIDE of the guitar. Bottom Right: A set of magnets is used to glue the cleats.

I will save the details for belly reduction, removal of bridges, regluing of bridges and installation of cleats for another time. For Episode #22 I want to focus specifically on what to do between bridge removal and bridge reglue… when a bridge removal goes bad!

Not every bridge comes off clean. Even when you do everything right, some amount of tearout in the soundboard is expected. If the damage is minimal, which is usually the case, the bridge can be re-glued without any patching of the soundboard. If the tearout is significant enough to negatively affect the glue joint, then patching of the area is necessary. The patch may be the size of a dime or much larger.

In this worst case scenario the footprint under the bridge was affected throughout. I unfortunately never took a “before” picture of the damage, but take my word for it, it was bad!

Why did this happen? In this case, the lifting bridge had progressed so far, and in such a way, that the spruce had already begun tearing out before bridge removal even began.

My solution was to rout out the entire footprint of the bridge to a depth that eliminates 95% of the damage, and install a spruce patch.

I say “95% of the damage” because certain areas of tearout were so deep that it was neither sensible nor necessary to rout the whole footprint to such a depth.


Rout bridge area for patch
Notice the small areas of tearout that remain after routing. This is acceptable.

I routed the pocket with a 3/32″ bit in a dremel tool and a Stewmac saddle routing jig. Any “sled” type device that fits a dremel tool will work for this. The saddle routing jig works particularly well because of the Baseplate Travel Stops and the Jig Reference Plate (see image below).

The Baseplate Travel Stops prevent me from accidentally routing beyond the area of the footprint. The Jig Reference Plate allows me to work my way from the front of the bridge to the rear in multiple, parallel passes by adjusting the Jig Guide Plate to the Jig Reference Plate and then resetting the Jig Reference Plate with feeler gauge tabs after every pass. I’ve borrowed the image below from Stewmac’s website. This should hopefully help illustrate what I am talking about, even though the picture shows the jig routing a saddle slot, which is it’s actual, intended purpose.

4043

For the majority of the rout I do not have to adjust the Baseplate Travel Stops. It is only for the rounded section of the footprint in the back that I need to adjust the travel stops inward after each pass. The 2 curved sections of the footprint (indicated by the arrows) then have to be touched up carefully with a chisel and/or a razor

Arrows bridge wings

An oversized spruce patch is cut to shape and glued in place.

Glue a spruce patch to footprint

I level the patch with a thumb plane and fine-tune it with sandpaper on a flat block.


Level spruce patch in bridge footprint

Level bridge patch with sandpaper


Once the patch is flat and level with the surrounding lacquer, I turn my attention to cleaning up the mating surface of the bridge.

Ordinarily for a bridge glue, I would sand the mating surface to the radius of the guitar top. The patch, however, has no radius, so the mating surface of the bridge is sanded flat on a granite block.


Flatten bridge

I relocated the bridge and clamped it in place so that I could mark the pin holes on the new patch and drill.

Spruce patch in bridge footprint (2)

The guitar is now ready for a standard bridge glue-up.

After the Glue-up: Since the spruce patch sits level with the surrounding lacquer, rather than level with the wood of the soundboard, I made sure to seal around the bridge with brush on lacquer. You can also use superglue. Either way, it should be carefully applied.
Was this useful? I would love to hear your questions or comments! I try to answer every e-mail I receive, so please be patient with me :) eric@ericschaeferguitars.com

Want more of this? Subscribe below for Weekly Guitar Making Tips on “The Small Shop Luthier Blog”


Want to learn more? Take a class with Eric Schaefer and build your own guitar in 8 days

ES BACKGROUND